| Suggestions on
the Adjustment and use of: Armstrong 5500 and 5700 Series Shapers |
SELECT THE
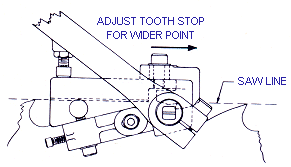
PROPER TOOTH STOP FOR THE GAUGE OF THE SAW
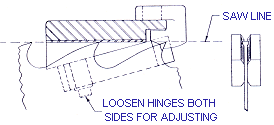
ADJUST HINGES AND SIDE DIES |
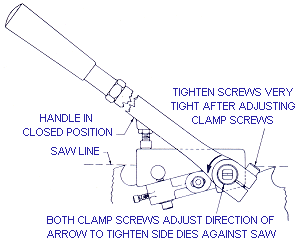 ADJUST CLAMP SCREWS
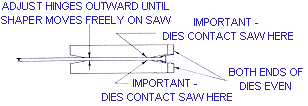
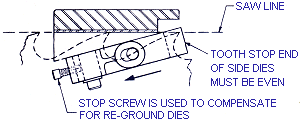
SET SIDE DIES
|

| Suggestions
on the Adjustment and use of: Armstrong 5500 and 5700 Series Shapers |
|||||||
SUMMARY OF ADJUSTMENTS
FINAL ADJUSTMENT – To be made by tooth stop
|
CAUTION: MAKE SETTINGS ON CLAMP SCREWS WITH CLAMP LEVER IN CLOSED POSITION (LEVER CLOSE TO CYLINDER) TO PREVENT DAMAGE TO TOOTH STOP. |
||||||
|
|||||||